 Building multi - Platform user interfaces with uiml
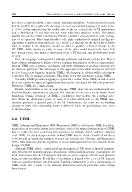
They have a high threshold, a low ceiling, and unpredictability. A high threshold means that the toolkit often requires the developer to learn specialized languages in order to use it. A low ceiling indicates that the toolkit only works for a small class of UI applications (e.g. a Web-based UI tool that will not work with other interface styles). D...
 42 trang | Chia sẻ: tlsuongmuoi | Ngày: 19/01/2013 | Lượt xem: 2491 | Lượt tải: 0
 Temporal aspects of multi - Platform interaction
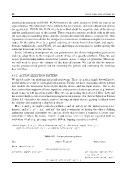
Informal descriptions in PUAN. PUAN borrows the table format of UAN for part of its representation. The tables have three columns for user actions, system feedback and system (or agent) state. PUAN, like UAN, tries to be neutral about the cognitive state of the user(s) and the application logic of the system. These separate concerns are dealt with ...
 42 trang | Chia sẻ: tlsuongmuoi | Ngày: 19/01/2013 | Lượt xem: 2585 | Lượt tải: 0
 Multiple user interfaces - Cross - platform applications and context - aware interfaces
Acknowledgements xv About the Editors xvii Contributors xix PART I BASIC TERMINOLOGY, CONCEPTS, AND CHALLENGES 1 1 Executive Summary and Book Overview 3 Ahmed Seffah and Homa Javahery 1.1 Motivation 3 1.2 A Few Definitions 4 1.3 Challenges 5 1.4 Specific Objectives 5 1.5 Audience 6 1.6 Overview 6 References 9 2 Multiple User Interfaces: Cross-Platf...
 42 trang | Chia sẻ: tlsuongmuoi | Ngày: 19/01/2013 | Lượt xem: 3175 | Lượt tải: 0
 Mel scripting
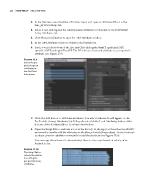
In the Outliner, select the blue_nParticle object, and open its Attribute Editor to the blue_nParticleShape tab. 3. Scroll down and expand the Add Dynamic Attributes section below the Per Particle Array Attributes list. 4. Click the General button to open the Add Attribute window. 5. In the Add Attribute window, switch to the Particle tab. 6. Scrol...
 105 trang | Chia sẻ: tlsuongmuoi | Ngày: 19/01/2013 | Lượt xem: 3164 | Lượt tải: 0
 Adding Fur to Characters
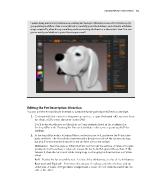
Editing the Fur Description: Direction You can use the Artisan Brush interface to comb the fur by painting the Direction attribute. 1. Continue with the scene from the previous section, or open the hound_v03.ma scene from the chapter15\scenes directory on the DVD. You’ll notice that there is no Direction or Comb attribute listed in the attributes f...
 105 trang | Chia sẻ: tlsuongmuoi | Ngày: 19/01/2013 | Lượt xem: 3108 | Lượt tải: 0
 Introducing particles
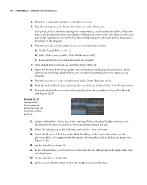
Switch to a side view, and turn on wireframe mode. 5. Play the animation, and observe the behavior of the nParticles. If you look at the Collisions settings for moltenMetal, you’ll see that the Self Collide attribute is off, but the nParticles are clearly colliding with each other. This type of collision is part of the liquid behavior defined by th...
 105 trang | Chia sẻ: tlsuongmuoi | Ngày: 19/01/2013 | Lượt xem: 3089 | Lượt tải: 1
 Bump and Normal Mapping
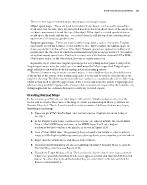
There are two types of normal maps, object space and tangent space: Object space mapsâã‡â㉠âã‡â㉠These are used for nondeforming objects, such as walls, spaceships, trash cans, and the like. They are calculated based on the local object space of the object. Up in object space means toward the top of the object. If the object is rotated upside dow...
 105 trang | Chia sẻ: tlsuongmuoi | Ngày: 19/01/2013 | Lượt xem: 3474 | Lượt tải: 0
 Lighting with mental ray
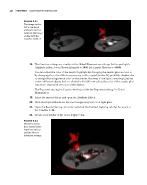
The Caustics settings are similar to the Global Illumination settings. In the spotlight’s Attribute Editor, lower Photon Intensity to 3000. Set Caustic Photons to 80000. You can adjust the color of the caustic highlight by changing the caustic photon color or by changing the color of the transparency on the crystal shader. It’s probably a better id...
 105 trang | Chia sẻ: tlsuongmuoi | Ngày: 19/01/2013 | Lượt xem: 2879 | Lượt tải: 0
 Skinning Geometry
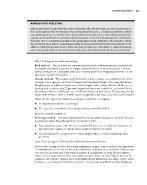
Broken-Joint Skeletons Keep in mind that you also have the option of binding only selected joints. In some circumstances, this can be quite useful. For example, if you set up what is known as a broken-joint skeleton, which uses additional bones outside the main skeleton hierarchy as deformers, these additional joints are usually constrained to the ...
 105 trang | Chia sẻ: tlsuongmuoi | Ngày: 19/01/2013 | Lượt xem: 2892 | Lượt tải: 0
 Animation Techniques
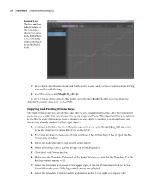
Copying and Pasting Driven Keys The trick at this point is to create the same driven key arrangement for the other five legs in the easiest way possible. You can achieve this using Copy and Paste. The important thing to remember is that to paste driven keys from a channel on one object to another, you should have one driven key already created for ...
 105 trang | Chia sẻ: tlsuongmuoi | Ngày: 19/01/2013 | Lượt xem: 2863 | Lượt tải: 0


